
That blocky bin by the siding drags the whole façade down, even on tidy streets today. A simple enclosure turns the mess into a neat accent and keeps trash cans out of sight. With smart materials and careful spacing, the fix looks intentional, works every week, and fits most budgets. Add ventilation, durable finishes, and easy access. The routine stays quick, while the front walkway finally feels calm and uncluttered.
Why a Discreet Corral Transforms Your Curb Appeal
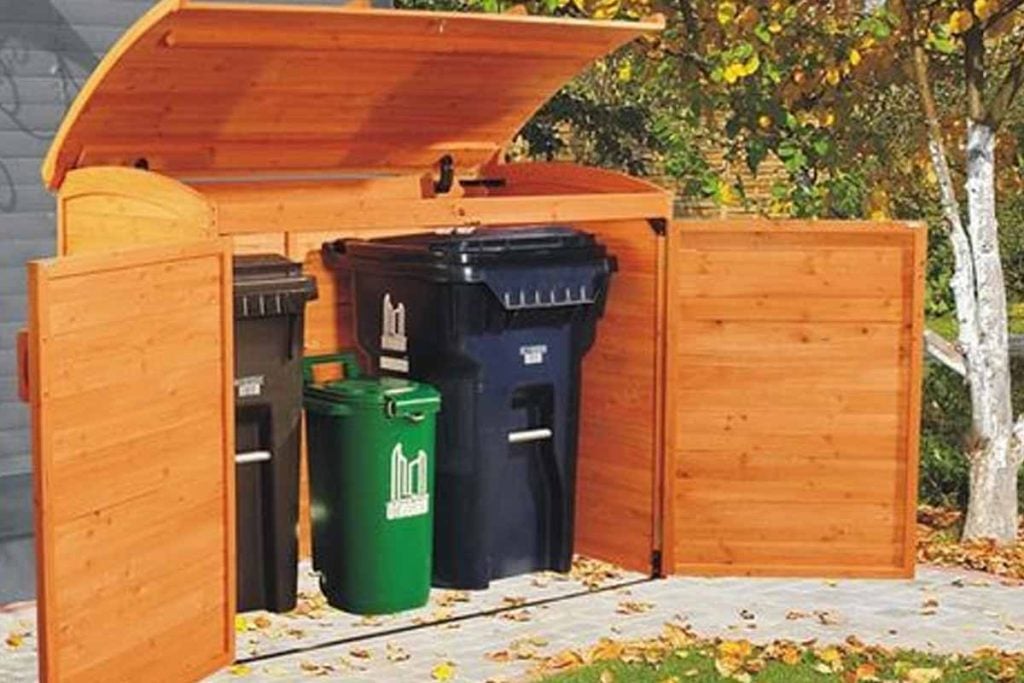
Prebuilt enclosures can look sharp, yet the average price hovers around $300, which stings when you only need screening. A DIY corral delivers similar polish for less, because you choose the footprint, finishes, and airflow. Your yard reads cleaner, while Trash Cans finally blend into the background without fuss.
Screening reduces odor cues and visual clutter, so the entry feels calmer and larger. Neighbors notice the continuity, and buyers read maintenance as care. Because the structure sits where bins live already, walking distance remains short. That means pickup day stays simple, and routine chores stop competing with curb appeal.
Corrals also discourage wind-blown lids and toppled bins. The enclosure blocks gusts, adds shade, and keeps wheels parked. While nothing deters every pest, a fenced barrier limits access to scraps, so critters lose interest faster. The upgrade solves looks, smells, and stability together, without changing your weekly habits.
Planning Space and Clearance for Trash Cans
Measure bin height, width, and handle swing before you dig. Posts must exceed your tallest bin, so the screen hides lids yet allows grip clearance. Leave wheel paths wide enough for turns, and include airflow gaps. Odor drops when air moves, yet rain still sheds away.
Mark utilities first to avoid damage while digging. Call your locator or use municipal maps, since punctured lines bring fines and hazards. Because some neighborhoods require approvals, confirm local rules and any HOA needs. Simple drawings help explain placement, scale, and finishes. Approvals often move faster when neighbors see tidy screening.
Set the footprint where routes are shortest from kitchen to cans to curb. Staging matters, because fewer steps keep routines easy on busy mornings. Plan a gate swing that clears sidewalks and vehicles. Keep the enclosure close, and position Trash Cans so lids open without scraping.
Materials That Last and Look Good
Four 4×4 wooden posts at 6 or 8 feet create a steady frame. Cedar resists rot, while treated lumber survives wet seasons. Lattice panels feel light and airy; traditional slat wood reads classic; vinyl stays low-maintenance. Caps and sleeves delay rot, although no cover is fully waterproof, so edges still need care.
Choose exterior screws for strength and later fixes. Cement mix locks posts, and a post-hole digger speeds consistent depth. Because tools matter, add a level, square, and clamps. A drill handles pilot holes and assembly. Simple gear keeps lines straight, joints tight, and panels quiet.
Paint or stain protects against UV and rain, and color ties the screen to trim. Match house hues to calm the view, or contrast for a feature wall. While finishes refresh style, function stays first, so Trash Cans remain reachable, shaded, and ventilated for drying after wash-downs.
Build Steps, Anchoring, and Ground Prep
Dig holes about 36 inches deep and 9 to 12 inches wide. Set posts plumb with temporary braces, then pour concrete to secure each base. Because height matters, check that posts will hide bin lids after settling. Re-measure diagonals, so the rectangle stays square before the mix cures.
Once footings firm up, fasten panels to the posts with exterior screws. Keep gaps consistent for airflow and quick drying. Add lattice caps where needed. Post sleeves finish edges cleanly. Because stability matters, tighten hardware again after a week, when lumber shrinks and joints relax. Set hinges level, so swing feels solid.
Ground surfaces change everything. Concrete pads or pavers prevent mud and pooling water, so wheels roll easily. Gravel drains well and costs less, although sweeping takes time. Hardening the path protects floors on trash day and keeps Trash Cans moving smoothly in all weather.
Finishing Touches, Care, and Local Rules for Trash Cans
Before you build on rented property, ask the owner; approvals avoid disputes. Where HOAs operate, written permission may be required, including heights and finishes. Because compliance matters, save emails and sketches. Clear records prevent future friction, especially when board members rotate or policies change without broad notices.
Think usability. Add a latch that opens with one hand while another pulls a bin. Install a simple stop, so gates don’t slam in wind. Label compartments for recycling and compost. Storage hooks handle bags and gloves, and small shelves keep cleaners ready for occasional rinse-outs. Night use stays easy with a small solar light.
Plan light maintenance each season. Tighten screws, re-seal wood, and touch up paint after storms. Rinse interiors, then dry with natural airflow to limit odors. Because habits matter, return Trash Cans after pickup, keep lids closed, and track wear, so small repairs never become rebuilds.
A cleaner façade and a smarter daily routine in one move
A small screen solves a daily eyesore with real, repeatable gains. The corral tames noise, smell, and clutter while protecting bins from wind. Materials stay simple, costs scale to budget, and the look reads intentional. Build once, then enjoy tidy paths and easily managed Trash Cans every week. Because you planned clearances, airflow, and drainage, routines stay smooth through every season. The front walk finally feels ordered without adding chores.